Click on my YouTube Short for this quilt!
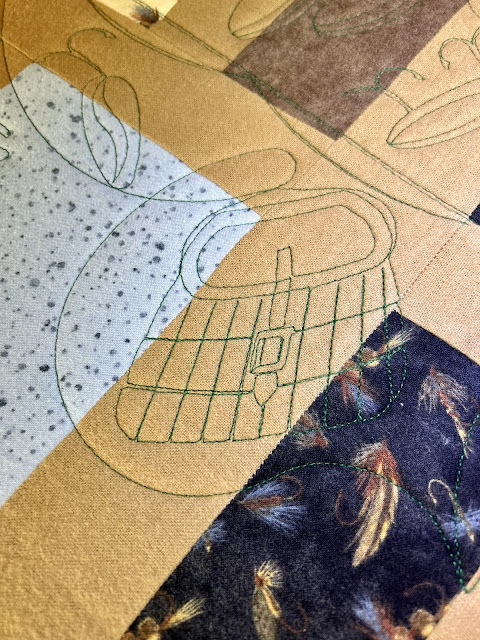
This Flannel Fly Fishing Quilt was brought in by a customer with the Fly-Fishing Theme
in her fabric choices. The person who was to receive this quilt apparently is an avid fly-
fisherman. Fortunately, my favorite long-arm digital stitch designer, Kim Diamond of
Sweet Dreams Quilt Studios” had several fishing continuous stitch patterns to choose
from. If you have not looked at Kim Diamond’s web site for stitching designs, here is her
link.
https://sweetdreamsquiltstudio.com/
As a general note, if I am looking for a stitching design for a particular quilt that I am
working on, I always search in Kim’s stitching collection. For one reason, her design work
always stitches out without issues, on my Gammill Statler Stitcher. For a second reason,
Kim holds a long and strong collaboration and friendship with the owners-designers of the
long-arm Statler that I use. I hold their relationship in awe and want to honor their years of
collaborating together. Loyalty and trust actually stand for something. Also, I know that
when I stich out one of Sweet Dreams Quilt Studio’s patterns, I will get amazing results.
For this Fly-Fishing quilt I used:
https://sweetdreamsquiltstudio.com/edge-edge/fishing-pano-006-p-15392.html
fishing pano 006 If this is not your choice for a fly-fishing stitch pattern, Kim has 34 choices when you search for “fishing” at her web site.
A fun note to make here is the
flannel fish backing fabric. This view is showing the backing fabric as
it rolls up on the back frame bar. As I quilt a project, I roll the
fabric sandwich (back fabric-batting-top pieced quilt) at the top of the frame.
You can see the bottom fabric with each turn of the roller-bar. I like to inspect the bottom thread tension
with each roll since this is the first time I can really get a good look at the
back-side of the quilt during the long-arm-stitching process. This is a good time to adjust the top or
bottom thread tension to make sure the thread is stitching with even
tension.
From the back side of my quilting frame, I have a clear view of the thread and its tension. I am always
double-checking the backing fabric as I look at the quilt from behind the Top-Frame-Scroll-Bar.
At the end of each stitched row, I walk around the back of the frame to inspect my stitching and
check the “plumb” or straightness of the quilt body. Not every quilt that I work on has straight lines
and is perfectly “plumb” from all 4 edges. But that is perfectly ok! As I stitch each row, I have the
opportunity to
bring each quilt back into “plumb” if need be.
This view below is the front of the quilt from the bottom of the quilting frame. This is my view when I am standing and quilting. I flipped over the quilt-sandwich to show the complimentary flannel fish with black background.
Visit me on YouTube, Instagram,
or Facebook.
https://www.youtube.com/@jewellscustomquilting938
https://www.instagram.com/jewellscustomquilting/
https://www.facebook.com/jewellscustomquilting/


Comments